I've had the materials for this project for awhile now.. and have been so excited to make it! I have seen desk stands like this all over and think they are just darling- but most of them are pretty expensive! So I made my own and I absolutely love it. It looks so cute on my desk- I may make another one for my office desk cause it is just so cute and so easy/cheap to make!
MATERIALS: -Wood block- i actually found a big strip of wood and just sawed a little block off... but I'm sure you could find blocks at a hardware store or craft store- OR you could use baking clay and form it into a block- then bake to harden -Wire-i found this copper wire at Walmart for $1 -Pliers- this just helps in forming the wire letters - Paint & Paintbrush- if you want to paint your wood block -Masking tape- to aid in painting designs on your block -Screw- i used a screw to add holes into my block where the wire fits in
1. I chose to color block a diagonal stripe on my wood- so using making tape, I just taped the design I wanted, then painted the block white.
2. After it dried, I took the tape off and it looked like this!
3. Form whatever word you want in the wire- I picked "hello," but really you can form whatever word you want! You could make a few different words and then swap them out every once in awhile for variety. Just make sure the wire is long on the two ends- because that is where it will insert into the wood.
4. Center the wire onto the wood and place little marks where you need to drill holes. I used a screw to add holes into the wood and it worked really well. You don't have to make them too deep, but just deep enough for the wire to stay in them.
5. Insert the wire into the holes and you are done! This was seriously so easy to make and it turned out super cute. This is the kind of thing I really like, but probably wouldn't buy myself- so making it was a great way for me to have one and not spend a lot of money.
Here is a simple diy to make a cute triangle banner out of... paper straws! Gold spray paint is one of my favorite things- seriously it makes everything look 10x fancier. This banner looks like it's metal- but it's not! Just made with cheapo paper straws :) This banner is SO cute and would look great as party decor.. or even just on a section of wall in your house/apt. Mine is currently hanging in my little craft corner.
Materials:
Paper straws (mine are cut in half for smaller triangles)
String
Gold Spray Paint
Step 1: Thread 3 straws onto the string
Step 2: Form the straws into a triangle shape and thread the string back along the top straw (the above picture shows which way to thread the string)
Step 3: Keep threading straws and forming triangles until your banner is as long as you would like
This diy was inspired by Ryan's cousin. She taught me how to make these at the latest family reunion. They were just so cute, that I had to make them again with my little baby clothespins. They are super great for decorating the fridge, but also they work great for making a hanging picture banner.
Step 1: Get some cute washi tape and cut stripes long enough to cover a side of the clothespin.
Step 2: Using a nail file, file the sides of the clothespins around the washi tape (it works better it you file vertically down on the sides of the clothespins)- you just want to make the washi tape easy to remove around the edges of the clothespins
Step 3: Remove the excess washi tape
Step 4: Super glue magnet strips to the backs of the clothespins
You got yourself some super cute clothespins to hold all your cute pictures/whatever else you put on your fridge :)
Guys. This is my third post this week- whaaa? I know. I decided that if I was going to be serious about getting this blog rolling, I needed to produce a lot of content- meaning three times a week. That is my goal, and the first week has been successful. Ha, we will see if it continues... but I am really going to try! Today, I made these really cute polaroid magnets. I know this isn't a super original idea, since I have seen them before on Pinterest, though I have never actually clicked on the pin. But I came across these cute little wood rectangles at the craft store, and thought making instagram polaroids would be a great way to add some personality to our kitchen. So maybe this is different from the other tutorials out there.. maybe it is exactly the same- idk, but either way, you should make them cause they turn out really cute.
MATERIALS
- Card Stock (I already had a poster board, so I just cut rectangles out the same size as the wood rectangles)
-Mod Podge (I found this one in the $1 bins at Target)
- Magnets (I bought a magnet roll that you can just cut)
-Wood Rectangles (I found these at Michael's)
-Pictures (I made this 4X6 collage on Walmart Photo's website- super cheap and the pictures turn out to be the perfect size. I just used some of my Instagram photos)
1. Cut out the individual photos
2. Trace you photo onto one of the pieces of card stock.
3. Cut the square you traced out- making the polaroid shape.
4. Using mod podge, or some other glue, glue the card stock frame on top of your photo. Then, glue the card stock/photo to the wood rectangle.
5. Since I used mod podge to glue the frame on, I also just painted a coat onto the top to give the magnet a nice glossy finish.
6. Add your magnets to the back of the frames (for some reason the magnets weren't sticking very well, so I glued them down with super glue to make sure they hold.
And you're done! You can write on the bottoms of them if ya want to give them that polaroid feel- or just leave them be and stick em on your fridge or any other magnetic board. But that's it- super easy and cute!
Ok, I don't know if this really counts as a DIY... but just go with it. Really this is just a creative way to hang a calendar. I am working on decorating a craft space and want a cute calendar to hang above my desk. I have seen calendars hung on clipboards (which is also cute), but I think this is another unique way to hang whatever you want- and it looks great on the wall.
1. We are going to spray paint the metal part of the hanger (unless you prefer it silver), so cover the wood part with masking tape so that the paint won't get on it.
2. Spray paint the metal part of the hanger- both sides.
3. Print out a cute calendar and simply clamp it on the hanger
And you're done. See.. told ya it might not really count as a DIY.. but hey, it looks really cute on the wall.
After weeks of moving into our apartment, we finally bought a couch. Which is great cause now when people come visit us we don't have to awkwardly suggest 'make yourselves comfortable on our floor...'. But now that the couch is in place, there is a big empty wall behind it that seems even more empty than it did when there wasn't a couch..SO I have decided to start making an art/picture gallery. I'm planning on actually making a lot of the art for it because 1. right now I have the time to do so, 2. saves money and 3. it is just fun. From searching for inspiration for this gallery, however, I noticed that I am drawn to work with some sort of calligraphy present. That being said, most really good looking calligraphy fonts are like $20 and you have to have some sort of Adobe software like Photoshop or Illustrator to actually use the fonts, both of which I do not have. Calligraphy kits themselves aren't that expensive, but I don't think I need the ink and the special pen to actually make things look pretty comparable. So I am faking it. And it actually doesn't look half bad. I don't know if this appeals to anyone else, but I figured I'd just share some of the tips I've learned in case anyone else wanted to learn how to make your writing look prettier.
1. Find your style. There are actually quite a few different looks to calligraphy- some more bubbly than others, some thinner...etc. I suggest going to Pinterest and typing in "calligraphy" in the search bar and just looking at all the different kinds of fonts- find one or two that you really like.
2. Practice your letters. Yeah so you know the girls who would practice their handwriting for hours to perfect it... yeah, that was me in elementary, middle, and high school. But this is what you need to do. Once you find some styles you like- copy it. Like literally trace it and practice every letter. Know what style of letter looks the best. This is important because you want the letters to all have the same style to make each word look uniform. 3. Practice your cursive. I was always really bad at cursive. I could never really get the hang of it in third grade, so I just never used it. But now is the time to learn. Use all those letters you practiced and now just write in cursive, figuring out how to transition from letter to letter. Don't worry about trying to make it look like calligraphy, just focus on the shape, style, and transition. 4. Enlarge the down-strokes. Basically the whole calligraphy look is achieved by fattening up your down-strokes, making sure that the beginning and end of the stroke blend back into the original print (so the middle of each down-stroke will be the thickest). You want the whole word to look cohesive and it to not just have random thick lines throughout it- blend everything so it looks nice. 5. Practice. Write slowly, be patient, and just practice a lot. It gets easier and you will get better :)
The perk of not having a job yet is that I get to craft all day er'day. Which is good, cause decorating an apartment is expensive! Like I knew furniture would be a chunk of money, but you don't really think about how much the little decorating stuff is.. like wall hangings, prints, side tables, rugs, etc. Who knew? Therefore, I am planning on DIYing a lot- cause really you can save so much money if you just do things yourself.
Now that we have a bed, I decided to make this super cute twine hanging to go over it to give the room a little boho style. This tutorial/idea came from Brit+Coand I love it. Really you can do any type of style, but I liked the tassel look.
I don't really know what I was thinking, cause I didn't take any pictures during the process of making this.. dumb Lindsay. But it is seriously so easy to make that I figured I could still list the steps and it would be easy to follow without pictures. Or you can just follow the Brit+Co tutorial. It has pictures.
The DIY is awesome cause it only uses 2 things: twine and a dowel! Both of which I got at Home Depot for cheap cheap.
MATERIALS:
2 rolls of household cotton twine
1 dowel (the ones at Home Depot are long enough for me to cut in half, so I didn't have to buy two of them)
Optional: dye/watercolor/some sort of coloring if you want to dye part of your twine
STEPS
Cut your dowel in half... or just make 2 dowels the same size- whatever size you want them to be
For the bottom layer, you will use a whole roll of twine. Measure and cut yard long pieces of twine. Yes this takes a while... so put on some Netflix or something.
Once the twine is cut, fold each piece in half and attach to one of your dowels (once folded, you should have 18 inch long fringe.) I put each piece folded on the dowel and tied a knot at the bottom of the dowel. Repeat till all your twine is gone. (Depending on the size you want this hanging to be, you can use less or more twine- also you can make the pieces longer or shorter obviously... up to you.)
To make the second tassel layer, start cutting yard long pieces of twine from your second roll. You will probably use about half of the roll.
Take about 20 pieces and cut them into fourths/fifths (depending on how short/long you want the tassels to be- shorter tassels if you cut into fifths)
Take an extra yard long piece and one of the group of 20 you just cut. Using the yard long piece, tie a knot around the center of the little cluster of twine (so that when you pick up the long piece of twine, the cluster folds in half.
Now, using either a piece already in the cluster or another little piece of left over twine, tie a knot around the cluster kinda near the top (this is making the tassel). Just let the left over string hang down with the rest of the fringe.
If you want to add some color to the tassels- now is the time to do so. Pour dye, or watercolor, or maybe food coloring works (idk, but probably it does cause watercolors did) - into a bowl and let your tassels soak in there for 10ish minutes. Pull em out, let them dry and bam- you have pretty colored tassels.
My hanging has 14 tassels... really you can make as many as you want- but once you have finished that, tie them onto the other dowel in whatever arrangement you like. They can just be in a straight line, or diagonal pattern like mine.. circle... random.. whatever you like.
Take a piece of yard long string and attach the two dowels together (by tying knots) on each side. This will give you excess string in the middle to hang your hanging.
Find a blank wall and hang it up!
Hopefully that wasn't too confusing- it's really not hard to make and pretty intuitive when you think about it. But next time I make something I will be sure to document the process cause pictures are just more fun to look at anyway, and I am definitely one of those learners where it really helps for me to actually see what is being talked about. So if this was confusing, sorry. My bad. I will be better next time. But you should try to make this anyway cause it's dang cute.
I have been sooo excited to make these rings since I bought the stones back in April. I just now finally had time to actually sit down and figure it out! At the beginning of this year, I started noticing these stone rings a lot- and I really loved them! But when I first saw pictures of them, I thought- I could totally just make those. So when Ryan and I were in Peru and a little lady was selling turquoise and quartz stones, I had to buy them. And then Ryan bought the silver thin wire and surprised me with it so that I could make the rings! So I finally made them, and I LOVE them. Seriously so easy to make and they just look really cool haha.
MATERIALS: - Pliers (these just really help wrap the wire tightly) - Stones (honestly this can be kinda tricky to find... I know you can buy some on Amazon or Ebay... it just might take some searching to find a price where you're not buying a bulk of stones- or you could and then make super cool rings and sell them) - Wire (Craft stores will have silver or gold thin wire like this- personally I think the gold would look really good)
1. Stretch the wire out (to measure it out, I loosely wrap the wire around my finger about 5 times and then use the pliers to cut it)
2. Starting from the middle, wrap the wire twice into a circle. To keep the circle in place, wrap the wire ends around the middle once on each side (like in the picture). Make sure to slip it on your finger a couple times in the process to make sure the size is right.
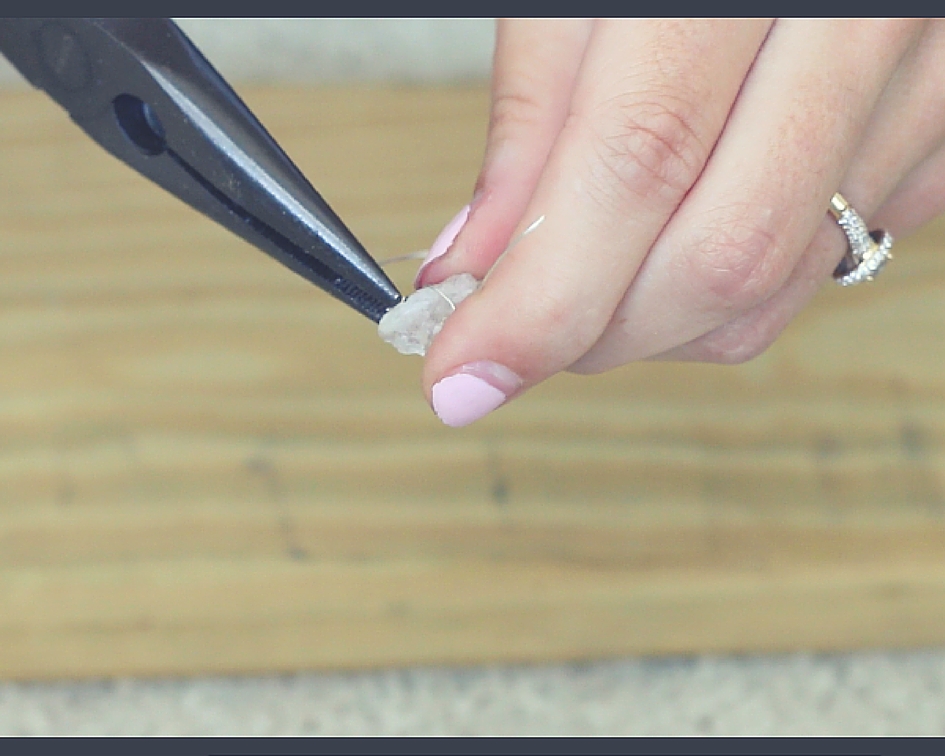
3. Place your stone in the middle. Starting with one side, wrap the wire around the stone and then using the pliers, wrap the rest of the wire in a coil around the wire circle to keep the stone in place. Then clamp the end of the wire down with the pliers so that the ring won't poke ya.
4. Do the same with the other side- and then you are done!